- Front-end
- Ionic
- Angular
- i18n
How to add localization (i18n) in Ionic applications created with Angular
August 2022
Introduction
In this guide we will address the problem of localization in an Ionic application.
Ionic is an open source UI tookit for creating applications for different environments using frameworks such as React, Angular and Vue.
In application development, it is often critical to have the ability to support multiple different languages or locales.
In this article, we will create a new project with Ionic 6 and Angular. Next, we will add support for localization using the ngx-translate library.
Finally, we will modify the project to automatically have the same language as the user's device, or in case the language is not supported by our application, a default locale (English).
Project creation
First, let's create a new Ionic project. To do this, you can use the convenient generator provided by Ionic here, specifying Angular as the technology and tab navigation, and any other preferences you might have: Ionic project generator You need to link your Github account or similar and the repository with the generated code will be automatically created.
Alternatively, a project can be created using CLI.
    # Globally install the ionic CLI if you had not done so before
    npm  install  -g  @ionic/cli
    # Create a new project
    ionic start
    # Answer the questions
    # Use the app creation wizard? No
    # Framework: Angular
    # Project name: sample
    # Starter template: tabs
Let's check that the project is working: enter the project folder and start it:
ionic serve
Adding i18n support
Now that we have our project, we can add localization support. To do this, we add the ngx-translate library to our project:
npm install @ngx-translate/core @ngx-translate/http-loader --save
We open the project with our trusted editor and import the module into the main NgModule of the application (in our case contained in the file src/app/app.module.ts) The body of the module (omitting the imports above), before any edit, looks like this:
@NgModule({
  declarations: [AppComponent],
  imports: [BrowserModule, IonicModule.forRoot(), AppRoutingModule],
  providers: [{ provide: RouteReuseStrategy, useClass: IonicRouteStrategy }],
  bootstrap: [AppComponent],
})
export class AppModule {}
Let's modify it to add the TranslateModule to the import. In addition, let's go create a custom TranslateLoader to look for our localization files inside the src/assets folder instead of the i18n/ folder; this is a prerequisite for Ionic. The complete code now looks like this:
import { NgModule } from '@angular/core';
import { BrowserModule } from '@angular/platform-browser';
import { RouteReuseStrategy } from '@angular/router';

import { IonicModule, IonicRouteStrategy } from '@ionic/angular';

import { AppRoutingModule } from './app-routing.module';
import { AppComponent } from './app.component';
import {TranslateLoader, TranslateModule} from '@ngx-translate/core';
import {TranslateHttpLoader} from '@ngx-translate/http-loader';
import {HttpClient, HttpClientModule} from '@angular/common/http';

export function createTranslateLoader(http: HttpClient) {
  return new TranslateHttpLoader(http, './assets/i18n/', '.json');
}

@NgModule({
  declarations: [AppComponent],
  imports: [
    BrowserModule,
    IonicModule.forRoot(),
    TranslateModule.forRoot({
      loader: {
        provide: TranslateLoader,
        useFactory: (createTranslateLoader),
        deps: [HttpClient]
      }
    }),
    AppRoutingModule,
    HttpClientModule
  ],
  providers: [{ provide: RouteReuseStrategy, useClass: IonicRouteStrategy }],
  bootstrap: [AppComponent],
})
export class AppModule {}
What we did:
- We added the TranslateModule
- We specified in the settings to use a specific TranslateLoader
- We created a factory function for our custom TranslateLoader so that files can be placed in the assets/i18n/ folder.
- We imported the HttpClientModule, so that we could use the HttpClient object in the function
Adding translation files
We can now add the localization-related files, one .json for each language.
We create a folder inside src/assets called i18n, and in turn we go and create two .json files, one called 'en.json' and one 'en.json':

Within both files, we are going to declare a simple json object containing a string, obviously translated into the respective language:
en.json
{
  "title": "Hello world"
}
it.json
{
  "title": "Ciao mondo"
}
Now that we have our translation, we can use the TranslatePipe provided by the library to reference the translated string in our component template. We open the "Explore-container" component generated by Ionic in the project creation phase and insert the pipe into the html code:
<strong>{{ 'title' : translate }}</strong>
Remember to import the TranslateModule into the module in case our IDE does not do it automatically.
Before we can verify that it works, we need to set a default language. Let's go into the app.component code:
  // Dependency inject of the TranslateService
 constructor(private translate: TranslateService) {
  // Set English as the default language
  this.translate.setDefaultLang('en');
}
Finally, we are ready to see the results! Let's start our app and check the content in the center of the screen: "Hello world" will now be shown!
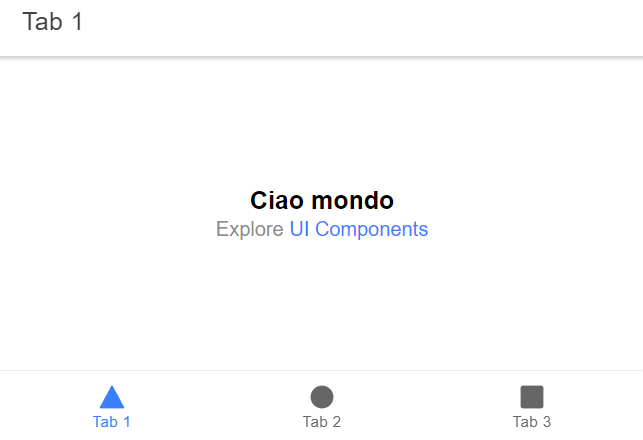
Let's check that by changing the language specified in the function to 'it' and refreshing the page, it will also be shown in Italian:

Use the user's preferred language
Now that we have the localization system working, all that remains is to get the language of the browser used by the user, so that we can automatically set the language used by our app. Let's edit the file app.component.ts :
  constructor(private translate: TranslateService) {
  this.initializeLanguageProperties();
}

initializeLanguageProperties(): void
  {
    // Set English as the default language
    this.translate.setDefaultLang('en');

    //If Api is available, retrieve preferred language and use it
    if (window.Intl && typeof window.Intl === 'object') {
      this.translate.use(navigator.language.slice(0,2));
    }

}
Explanation: For older versions of Ionic, it was suggested to use an external plugin, but nowadays this is no longer necessary.
In fact, we can make use of an API provided by the browser that allows us to get the language. I am referring to the navigator.language property, which has been supported by most browsers for some time now. More information here.
This api returns the language used in the format "en-us", "en-it" etc, so to match it to our 'en','it' files, we only need to fetch the first two characters of the string.
Conclusion
We achieved what we wanted: an Ionic project, created with Angular, capable of supporting multiple languages. We introduced support for English and Italian, and obtained from the browser the language to be used as the main one. In case the language used by the user is not supported, English will be used as the fallback language.
Thanks for reading the guide, see you next time 😉!